


How to Test a Replacement Screen Before You Seal the Device
Need this part? We stock tested replacement parts with same-day UK dispatch and a 12-month warranty.
<style>.d4u-article{–ink:#182126;–text:#46525a;–muted:#6d7880;–line:#dce5e8;–panel:#f5f8f8;–teal:#28796f;–gold:#bd8b3d;font-family:"Open Sans",Helvetica,Arial,sans-serif;color:var(–text);font-size:18px;line-height:1.68;}.d4u-article h2{font-size:23px;line-height:1.3;color:var(–ink);margin:38px 0 14px;padding-bottom:8px;border-bottom:1px solid var(–line);}.d4u-article p{font-size:18px;line-height:1.68;margin:0 0 16px;}.d4u-article table{width:100%;border-collapse:collapse;margin:20px 0;font-size:16px;}.d4u-article th,.d4u-article td{padding:12px 14px;border-bottom:1px solid var(–line);text-align:left;vertical-align:top;}.d4u-article th{background:var(–panel);color:var(–ink);font-weight:700;}.d4u-article .image-block{margin:26px 0;text-align:center;}.d4u-article .image-block img{max-width:100%;height:auto;border:1px solid var(–line);border-radius:8px;}.d4u-article figcaption{font-size:14px;color:var(–muted);margin-top:8px;}.d4u-article .faq{margin-top:40px;padding-top:8px;}.d4u-article .faq-q{font-weight:700;color:var(–ink);margin:22px 0 6px;}.d4u-article .faq-a{margin:0 0 4px;}.d4u-article .cta{margin-top:40px;padding:24px;border:1px solid var(–line);border-left:4px solid var(–teal);border-radius:8px;background:var(–panel);}.d4u-article .cta p{margin:0 0 14px;}.d4u-article .cta a{display:inline-block;background:var(–teal);color:#fff;text-decoration:none;padding:12px 22px;border-radius:6px;font-weight:600;}</style>
<div class="d4u-article">
Most screen returns are not caused by a faulty part. They are caused by a fault that was present when the panel was fitted and was not caught before the adhesive went down, which turns a five-minute check into a second repair and a second panel.
A pre-seal routine fixes that. It takes about ten minutes, it needs nothing beyond a known-good battery or charging source, and it converts the riskiest moment in a screen repair into a controlled one.
<h2>What should you test before sealing a replacement screen?</h2>
Touch, display, sensors, cameras and the seal.
Those five cover the failures that matter. Touch across the whole surface including the margins, brightness and colour at both ends of the range, the proximity and ambient sensors, the front and rear cameras, and Face ID where the device has it. Then the seal, which is tested by looking rather than by touching.
The order matters because it follows the assembly. Display and touch confirm the panel, the sensors and cameras confirm the transfer of components from the old assembly, and the seal confirms the work. A fault found at any stage is cheaper to fix before the next one.
<h2>How long should a pre-seal test take?</h2>
About ten minutes, once it is a routine.
The first few times it takes longer, because the technician is thinking about the sequence. After a fortnight it is automatic, and it is the same ten minutes that would otherwise be spent reopening a device, ordering a second panel and explaining the delay to a customer.
On a high-value assembly the calculus is not close. Ten minutes against the cost of a flagship panel, plus the labour of a second repair, is the cheapest insurance available on the bench, and it is the reason the routine belongs in a written process rather than in a technician’s memory.
<h2>How do you test touch across the whole panel?</h2>
Draw a grid, then test the margins.
Open a drawing or notes app and drag a finger across the display in horizontal and vertical lines, covering the whole surface at roughly two centimetre intervals, then run a continuous line around the perimeter. Dead zones cluster at the edges and near the notch or punch hole, which is exactly where a diagonal sweep misses them.
Where a device has a curved edge, include a pass that follows the curve. Touch faults at the margin are invisible in normal use and unmissable in a game, which means they return as a complaint rather than as an obvious failure. The causes are covered in <a href="/blogs/ic-transfer-iphone-screens-no-touch/">why an IC transfer can kill touch</a>.
<h2>How do you check brightness, colour and the ambient sensor?</h2>
Full range, both extremes, then cover the sensor.
Take the brightness from minimum to maximum and watch for a step, a flicker or a band. Then look at a white screen and a black screen at an angle, which is where an aftermarket panel loses contrast and where a poor lamination shows as a haze. Both are judgement calls, but they are judgement calls made in ten seconds rather than by a customer.
The ambient sensor is tested by covering the top of the device and watching the brightness respond. Automatic brightness that has stopped working is one of the most common after-repair complaints and one of the easiest to catch before sealing. It is also a fault that is very hard to attribute once the device has left the shop.
<figure class="image-block"><a href="/iphone_0_1_2/iphone-screen">
<img src="/image/cache/catalog/6000-6999/6776/Replacement%20LCD%20Screen%20Soft%20OLED%20Diagnostic%20For%20iPhone%2015%20Pro-500x500w.png" alt="Soft OLED diagnostic replacement screen for iPhone 15 Pro" width="500" height="500" />
</a><figcaption>A diagnostic panel lets the replacement be proven before the customer’s device is closed.</figcaption></figure>
<h2>What needs testing on a device with Face ID?</h2>
The module transfer, before the panel is bonded.
Face ID components are paired to the logic board and have to be transferred from the old assembly, so the test has two parts: does the module work, and did the transfer damage it. Both are answered by enrolling and unlocking, not by looking at the settings screen.
Doing this before the adhesive is applied is essential, because a Face ID failure discovered afterwards means lifting a bonded panel. The reasons the transfer goes wrong, and the handling rules that prevent it, are set out in <a href="/blogs/face-id-not-working-after-screen-replacement/">why Face ID fails after a screen replacement</a>.
<h2>Which functions do customers notice first when they go wrong?</h2>
Cameras, microphones and the proximity sensor.
Those three are used in the first hour of ownership and are impossible to miss. A front camera that is not seated, a microphone that is not connected, or a proximity sensor that does not blank the screen during a call all produce an immediate complaint, and all three are caused by the transfer rather than by the panel.
The camera test should cover both the front and rear modules and the flash, because the rear camera also has to be seated correctly when the assembly is refitted. Where the job includes camera work, the part-matching decisions are covered in <a href="/blogs/iphone-camera-lens-replacement-glass-or-module/">choosing between a lens and a module</a>.
Audio deserves its own pass. Play a recording and make a call, which tests the earpiece, the main microphone and the noise-cancelling path in one go. The way a fault presents depends on which microphone is affected, so the test should cover all of them rather than only the one the customer has complained about in the past.
<h2>How do you test without fully reassembling the device?</h2>
Connect the new panel, support it, and power the device on.
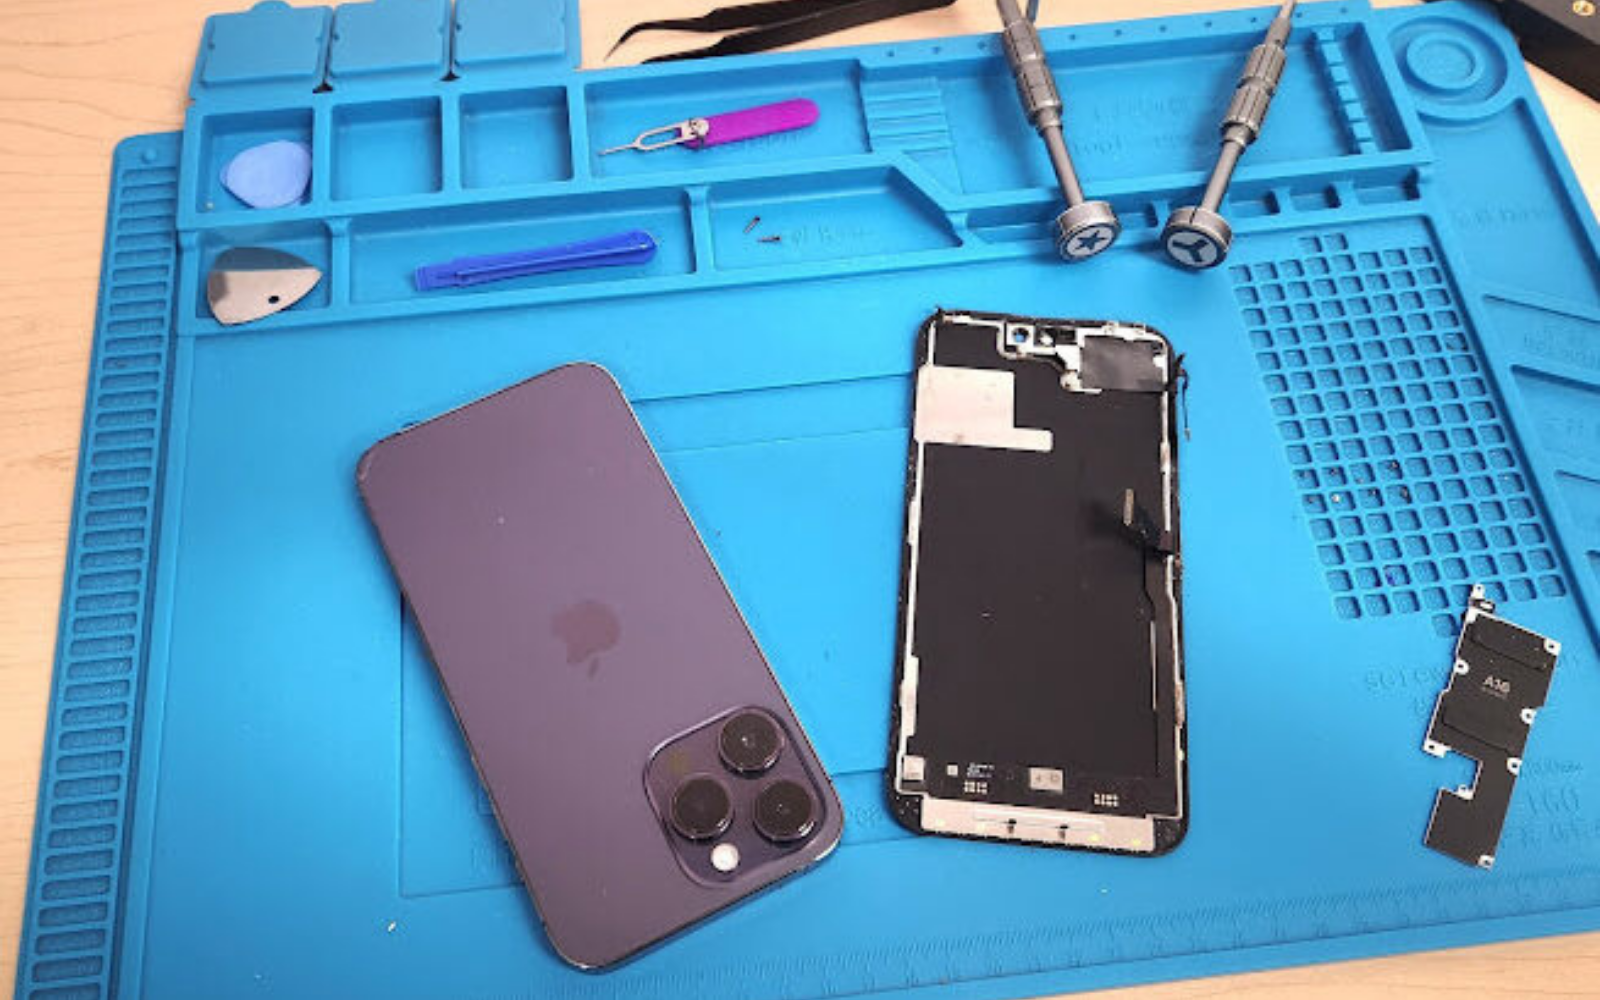
Most of the test can be run with the display resting in position and connected, before any adhesive is used. A support block or a soft surface stops the panel moving while the device is powered on, and a known-good battery or a bench supply keeps the test independent of the customer’s cell.
This is also where a diagnostic panel earns its place. Rather than risking the final assembly on an untested board, the diagnostic panel confirms the device works, and the finished assembly goes on once. On a flagship repair that single habit is usually the difference between a profitable job and an expensive one.
<h2>What should you do if a test fails?</h2>
Stop, and identify which side the fault is on.
The failure is either the new panel, the device, or the transfer of parts between them, and the test sequence already tells you which. Reconnect the original panel if it still works, or fit the diagnostic panel, and the fault either follows the panel or stays with the device.
That answer decides what happens next. If the panel is at fault, the shop has a claim against the supplier and should record the batch reference and photograph the fault. If the device is at fault, the customer has a different conversation and a different quote. Neither is possible to establish once the device is sealed and the customer has taken it home.
<h2>Why does the seal itself need testing?</h2>
A lifting panel is the most expensive return there is.
After the adhesive is applied and the device clamped, the finished job has to be looked at properly: the panel flush around the perimeter, the frame straight, no light leak against a dark screen, and no dust visible under the glass before it is too late to remove. A five-second inspection at this point prevents the failure mode that comes back most often.
The seal also determines what the shop can promise. Water resistance depends on the correct gasket and fresh adhesive, and on a device that has been opened it should be described honestly rather than assumed. That is a consumable purchase, not a technique.
<h2>What should be written on the job sheet?</h2>
The panel, the tests, and the result of each.
Record which assembly was fitted, including the grade and the batch reference, and tick off the tests that were run. Write down anything that did not work before the repair, and anything the customer declined. Those notes are what turn a later dispute into a conversation.
The record also feeds the shop’s own buying decisions. Once outcomes are recorded by panel and supplier, the returns rate by line becomes visible, which is the only reliable basis for deciding which supplier keeps the account. The wider returns process is described in <a href="/blogs/parts-returns-and-doa-claims/">building a parts returns process</a>.
<figure class="image-block"><a href="/tools">
<img src="/image/cache/catalog/tools/2uul%20DA02%201-1000×1000.png" alt="2UUL DA02 third generation oversize press clamp for phone and tablet glass replacement" width="500" height="500" />
</a><figcaption>The clamp comes after the test, never before it.</figcaption></figure>
<h2>How does a test routine change your returns rate?</h2>
It removes the returns that were never about the part.
Shops that adopt a written pre-seal routine usually find their returns fall without changing supplier, because a large share of what they were recording as part failures were transfer and seating faults. That matters for margin and it matters for the buying decision, since a supplier blamed for faults it did not cause is a supplier that gets replaced for no reason.
The routine also makes the second return cheaper when it does happen, because the job sheet says exactly what was tested and what was fitted. That evidence is what supports a supplier claim, and it is what a customer sees instead of an apology.
<h2>What is the one test that catches the most failures?</h2>
Touch, across the margins, before anything is bonded.
Touch faults are the most common panel-related return and the easiest to find, provided the test covers the edges and the area around the notch or punch hole. A two-minute grid and perimeter sweep catches almost everything a customer would otherwise discover later.
Everything else on this list is about confirming the transfer and the seal. Retail customers keep their rights on the finished work under the <a href="https://www.legislation.gov.uk/ukpga/2015/15/contents" rel="nofollow">Consumer Rights Act 2015</a>, and the behaviour of a device with a replacement display is documented by Apple at <a href="https://support.apple.com/en-gb/103256" rel="nofollow">about genuine iPhone displays</a> and at <a href="https://support.apple.com/en-gb/102658" rel="nofollow">iPhone parts and service history</a>. Replaced panels are waste under the <a href="https://www.legislation.gov.uk/uksi/2013/3113/contents" rel="nofollow">Waste Electrical and Electronic Equipment Regulations 2013</a>, and parts placed on the market fall to the <a href="https://www.gov.uk/government/organisations/office-for-product-safety-and-standards" rel="nofollow">Office for Product Safety and Standards</a>.
<div class="faq">
<h2>FAQ</h2>
<p class="faq-q">What should I test before sealing a replacement screen?</p>
<p class="faq-a">Touch across the whole surface and the margins, brightness and colour at both extremes, the proximity and ambient sensors, both cameras, audio, Face ID where the device has it, and finally the seal itself. The whole routine takes about ten minutes once it becomes habit.</p>
<p class="faq-q">How do I test a replacement screen without fully reassembling the phone?</p>
<p class="faq-a">Connect the new panel, support it so it cannot move, and power the device on with a known-good battery or bench supply. Most of the test runs before any adhesive is used, and a diagnostic panel lets you confirm the device before risking the final assembly.</p>
<p class="faq-q">What is the most common fault found in a pre-seal test?</p>
<p class="faq-a">Touch dead zones at the margins and around the notch, followed by proximity and ambient sensor faults caused by the component transfer rather than by the panel. Both are easy to find and almost impossible to attribute once the device has left the shop.</p>
<p class="faq-q">How much does a pre-seal test routine reduce returns?</p>
<p class="faq-a">Most shops see returns fall without changing supplier, because a large share of what they had recorded as part failures were transfer and seating faults. It also makes any genuine supplier claim stronger, since the job sheet records what was tested and what was fitted.</p>
</div>
<div class="cta">
<strong>Test the panel before you seal it.</strong> Digi4u lists replacement screens by grade and supplies the diagnostic assemblies, adhesives and bench tools a pre-seal routine needs.
<a href="/wholesale">Open a trade account</a>
</div>
{
"@context": "https://schema.org",
"@type": "FAQPage",
"mainEntity": [
{"@type": "Question", "name": "What should I test before sealing a replacement screen?",
"acceptedAnswer": {"@type": "Answer", "text": "Touch across the whole surface and the margins, brightness and colour at both extremes, the proximity and ambient sensors, both cameras, audio, Face ID where the device has it, and finally the seal itself. The whole routine takes about ten minutes once it becomes habit."}},
{"@type": "Question", "name": "How do I test a replacement screen without fully reassembling the phone?",
"acceptedAnswer": {"@type": "Answer", "text": "Connect the new panel, support it so it cannot move, and power the device on with a known-good battery or bench supply. Most of the test runs before any adhesive is used, and a diagnostic panel lets you confirm the device before risking the final assembly."}},
{"@type": "Question", "name": "What is the most common fault found in a pre-seal test?",
"acceptedAnswer": {"@type": "Answer", "text": "Touch dead zones at the margins and around the notch, followed by proximity and ambient sensor faults caused by the component transfer rather than by the panel. Both are easy to find and almost impossible to attribute once the device has left the shop."}},
{"@type": "Question", "name": "How much does a pre-seal test routine reduce returns?",
"acceptedAnswer": {"@type": "Answer", "text": "Most shops see returns fall without changing supplier, because a large share of what they had recorded as part failures were transfer and seating faults. It also makes any genuine supplier claim stronger, since the job sheet records what was tested and what was fitted."}}
]
}
</div>
Part of the Screen Grades & Warranty guide.