


Repair Shop Layout: Setting Up the Bench for Throughput
Need this part? We stock tested replacement parts with same-day UK dispatch and a 12-month warranty.

Most repair shops are laid out by accident. The bench arrived first, the parts followed, and the tools ended up wherever there was a socket. A year later, every job involves moving something.
Layout is a throughput decision. The way the bench, the parts and the tools are arranged decides how many jobs a day the shop can finish without adding staff or hours.
Why does layout affect throughput?
Because every unnecessary movement costs time.
A technician who walks to a drawer for a screwdriver, back to the bench, then across the room for a battery loses minutes on every job. Twenty jobs a week turns that into hours.
The fix is not a bigger shop. It is putting the things used together within reach, and keeping the things used occasionally out of the way.
Measure the walk before changing anything. Count the steps from the bench to the parts shelf, the tool rail and the collection point, then look at which of those trips happens ten times a day.
The longest repeated walk is the first thing to fix. It is usually the parts shelf, because the part is fetched after the device is already open and the technician cannot leave it safely.
Where should the repair bench sit?
Where the technician is out of the customer’s path.
A bench beside the counter looks friendly and is a constant interruption. Every customer who walks in breaks concentration, and a screen lift is not a job to restart halfway through.
Put the bench behind or beside the counter, with a clear route from intake to bench and from bench to collection. The customer should be able to see that work is happening without standing over it.
Think about the door as well. A bench in line with the entrance catches cold air, street dust and the first gust of rain, none of which helps an open device.
A screen or a half-height partition helps. It keeps the conversation separate without hiding the workshop, and it stops a customer leaning over the bench to point at the phone.
How do you separate intake from repair?
With two surfaces and a labelled tray.
Intake needs a clean surface for the device, the paperwork and the customer’s details. Repair needs a surface that can hold an open device, tools and a parts tray without any of them touching.
The tray is the handover point. A device goes into a labelled tray at intake and does not reach the bench until the job sheet is complete, which stops devices arriving at the bench without a record.
Use one tray per device rather than one tray for the day. A tray with a job number, the customer’s name and the fault written on it is the simplest tracking system a small shop can run.
The intake surface should also hold the accessories. SIM trays, cases and memory cards go into a labelled bag with the device, so nothing is lost between the counter and the bench.
Where should parts live?
Close to the bench, sorted by frequency, not by brand.
The lines used every day belong within arm’s reach. The ones used monthly can sit further away, and the ones used rarely belong in storage rather than in the working area.
Sort by how often the part is picked, then by model within that. A shelf organised alphabetically by supplier looks tidy and slows down every job.
Label the shelf edge, not the box. A label on the shelf stays in place when the stock is replaced, and it makes a missing line obvious at a glance.
Keep a small returns box beside the parts shelf. Old parts go in it as they come off the device, which stops them accumulating on the bench and makes the monthly return claim much easier.
How much bench space does each job need?
Enough for the device, the tools and a parts tray.
A phone job needs roughly the width of an open device plus a tray for screws and a mat for tools. A tablet job needs considerably more, and a MacBook needs more again.
Mark the working area with a mat. It defines the space, protects the surface and gives the technician a visual cue when the bench is getting too crowded.
Choose a mat that contrasts with the parts. Small black screws disappear on a black mat, and finding one costs more time than the mat would have.
A raised edge on the mat is worth having. It stops a screw rolling onto the floor, which is the most common cause of a device going back together with one fastener missing.
Where should the tools go?
On a stand or a rail, ordered by the job.
The tools used in the first minute of a job should be nearest: the opening pick, the driver, the suction cup. The ones used at the end, such as the adhesive roller, can sit further along.
A tool that is used on every job should never be in a drawer. A tool that is used once a month can be, as long as it has a labelled place.
Keep a duplicate of the cheapest tools. A second opening pick or driver costs little and removes the moment where a technician stops work to find the only one.
Clean the tools at the end of the day rather than the start. A dirty tip or a sticky pick slows the first job of the morning, when the shop is busiest.
Keep a small tray for the tools in use on the current job. It moves with the device and stops the rail being stripped every time the work changes.
That tray also makes the end-of-job reset obvious: if anything is still in it, the job is not finished.
It is a small change with a daily return.
How do you handle fumes and cleaning?
At the source, with the extraction built into the bench.
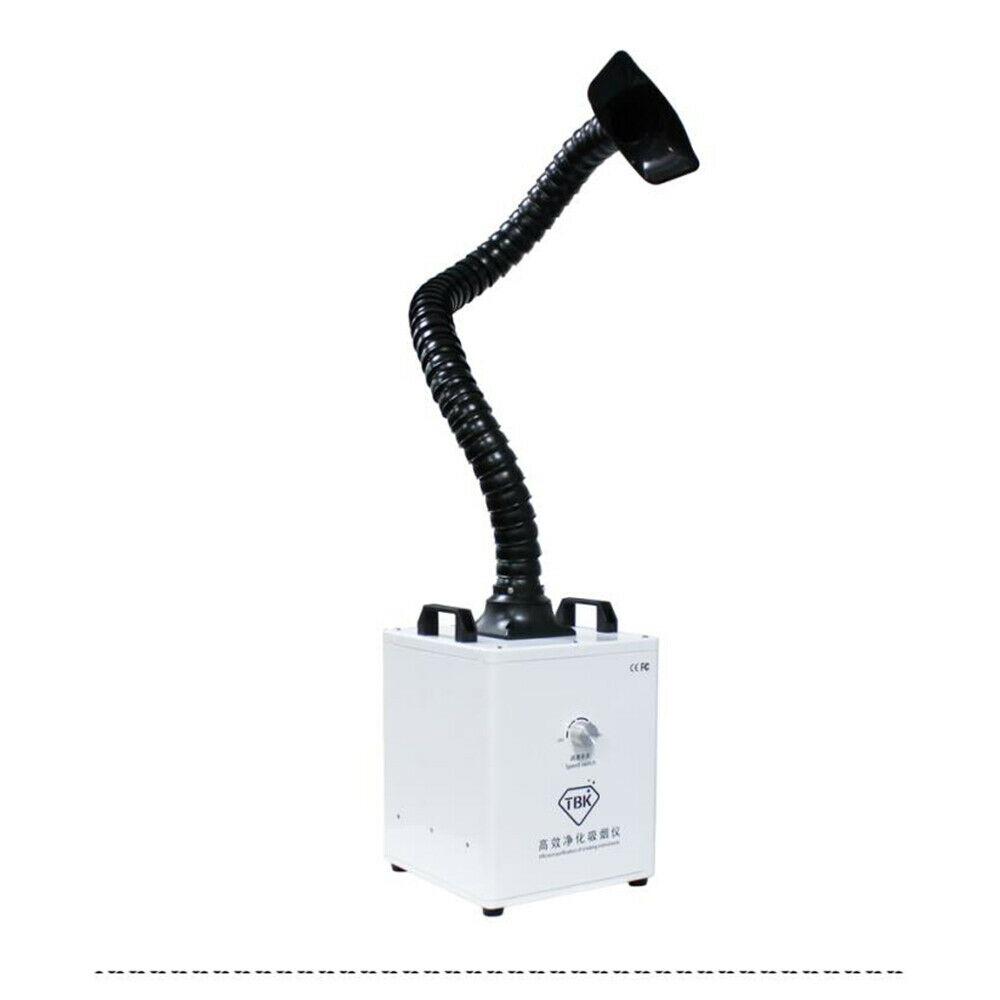
Soldering, hot air and adhesive removal all produce fume. An extractor placed at the back of the bench, with the nozzle near the work, captures most of it before it reaches the room.
Cleaning solvents need their own area, away from the parts and the customer counter. The layout should make the safe choice the easy one, which is the principle behind the workshop rules in ESD control in a repair shop.
What about lighting and power?
Bright, adjustable and above the work, not behind it.
A light behind the technician casts a shadow over the device. A light above and slightly in front shows the connectors and the screws without glare.
Power should come from a bench-level strip rather than a wall socket behind the clutter. Every additional reach across a live device is a risk.
How do you keep the bench clear?
With a five-minute reset between jobs.
Tools back on the rail, screws back in the tray, the old part in the returns box and the device on the collection shelf. The reset is what stops one job’s clutter becoming the next job’s mistake.
A bench that is cleared at the end of every job is also easier to inspect. A missing screw or a stray blade is visible immediately.
How do you lay out a board-level corner?
As a separate zone with its own extraction and power.
Board work needs a microscope, a hot air station, a preheater and an extractor. Those tools should not share a bench with screen work, because the heat and the fume affect both.
A corner with a solid surface, good light and a dedicated circuit is enough. The equipment list is described in what to buy first for board work.
What does a small shop layout look like?
Three zones in one room, with clear edges.
Intake at the front, repair in the middle, storage at the back. Each zone has a surface, a purpose and a boundary that is visible from the door.
Even a small shop can do this with shelving and mats. The important part is that the boundaries exist, not that the room is large.
How do you change a layout without closing?
One zone at a time, over a weekend.
Move the parts first, because that has the least effect on the bench. Then the tools, then the bench itself. Each move is small enough to test before the next one.
Label everything before it moves. A layout change that leaves the shop unable to find a part for a week costs more than the change saves.
What is the one rule for layout?
Put the work where the hands are.
Everything used in a job should be within reach of the person doing it. Everything else should be out of the way, labelled and easy to find when it is needed.
Around it sit the ordinary disciplines: separate intake from repair, sort parts by frequency, extract at the source and reset the bench between jobs. The consumables that keep the bench running are described in the consumables that decide your margin, and the machines in which machine does which job. Bench safety comes under risk assessment at work, electrical safety under HSE electrical safety, consumer contracts under the Consumer Rights Act 2015, disposal under the Waste Electrical and Electronic Equipment Regulations 2013, and product safety with the Office for Product Safety and Standards.

FAQ
How much space does a phone repair bench need?
Enough for an open device, a parts tray and the tools used in the job, plus a clear mat boundary. A tablet or MacBook job needs more, so the bench should be sized for the largest work the shop takes on.
Should the repair bench be visible to customers?
Visible is fine; accessible is not. Customers should be able to see that work is happening without standing over the technician or interrupting a delicate step.
Where should soldering and hot air work happen?
In a separate corner with its own extraction, power and solid surface. Fume and heat affect screen work, so the two should not share a bench.
How do I reorganise without losing parts?
Move one zone at a time, label everything before it moves, and start with the parts shelf. A weekend per zone is enough for most small shops.
A bench built around the work. Digi4u stocks the machines, tooling and consumables a UK repair shop uses, so the layout can follow the job mix.