

How to Fix a Phone Safely: Diagnose the Problem Before a DIY Repair
Need this part? We stock tested replacement parts with same-day UK dispatch and a 12-month warranty.

To fix a phone safely, diagnose the symptom before you buy DIY phone repair tools or a replacement part. Back up accessible data, identify the exact model, run the non-invasive checks for that fault, and read a model-specific repair manual from start to finish before opening the device. A frozen screen, a bad cable or a blocked speaker grille may not need hardware; a swollen battery, liquid damage or board work should stop a first-time DIY attempt.
Last updated:
Digi4u is a Cardiff-based UK supplier of replacement parts, repair tools and accessories for owners and repair shops. This refresh keeps the original diagnose-first structure and adds a clearer minimum-toolkit table, stop rules and verified product links for UK DIY and workshop use.
Apple, Google and Samsung all publish self-repair routes for supported devices, but each limits them to particular models and expects you to follow the correct manual. Apple Self Service Repair is intended for people experienced with complex electronic repairs; Google’s Pixel self-repair guidance recommends relevant technical experience; Samsung’s UK Self Repair programme sells genuine parts and guides for supported Galaxy models and states not to attempt self-repair on a swollen battery. Treat those limits as part of the job, not small print.
Use this order:
- Make the phone safe and preserve any data you can still access.
- Describe one exact symptom and test the simple external causes.
- Confirm the model, part and full procedure before buying tools or parts.
- Stop if the battery is swollen, the phone is wet or hot, or the repair needs soldering.
What problem are you actually trying to fix?
“My phone is broken” is not a diagnosis. Record what still works, what does not, and what happened immediately before the fault. Use the table to choose the next check without opening the phone.
| Symptom | Check first | Do not assume | Likely next route |
|---|---|---|---|
| Phone will not turn on | Known-working charger, cable and socket; allow a normal charging period; try the manufacturer’s forced-restart sequence | That the screen or battery is definitely faulty | Manufacturer troubleshooting, then professional diagnosis if there is no response |
| Screen is cracked but image and touch work | Back up data, protect loose glass and identify the exact model | That only the outer glass can be replaced at home | Model-specific screen guide or repair service |
| Screen is black, lined or touch is missing | Forced restart, signs of power, visible impact damage | That buying a display will solve every cause | Diagnosis before ordering a part — see our screen lines and black spots guide |
| Phone will not charge | Known-good cable and adaptor, another socket, lint, liquid warning and connector damage | That an angle-sensitive cable proves the charging-port flex is bad | Cable/charger replacement, safe port cleaning guidance, or port diagnosis |
| Battery drains quickly | Battery-health information, app usage, signal conditions, updates and heat | That every drain complaint needs a battery | Usage/software diagnosis, then battery service if evidence supports it |
| Low or distorted sound | Bluetooth route, volume/accessibility settings, case obstruction and dry surface debris | That the speaker module has failed | Audio troubleshooting or professional inspection |
Make the phone safe before troubleshooting
Disconnect the phone from power if it is unusually hot, smells strange, produces smoke, or its screen or back cover is lifting. Do not press a lifted panel flat.
Samsung’s UK self-repair guidance says not to attempt self-repair on a phone with a swollen battery. Move it away from flammable material and arrange advice from the manufacturer, an authorised service provider or an appropriately equipped repairer.
If liquid may be present, unplug accessories and avoid charging until the device is dry and the manufacturer’s instructions allow it. Do not use heat to accelerate drying. If the phone remains usable, back up photos, messages, authentication details and other irreplaceable data before any reset or disassembly.
Can this repair be done at home?
A repair becomes suitable for DIY when the fault is reasonably isolated, the exact model has a complete manual, the required parts and tools are available, and you can accept the risk of damaging the device or losing its original seal. Difficulty depends on the model as much as the component: two phones sold in the same year can open from different sides and route delicate cables through different places.
| Condition | DIY decision |
|---|---|
| The issue is solved by a restart, setting, cable or removable accessory | Proceed with the low-risk fix; no phone opening is needed. |
| A complete official or reputable model-specific guide exists and you can perform every step | Consider DIY after reading the full guide and preparing tools, parts and a clean work area. |
| The diagnosis is uncertain or several faults appeared after impact or liquid exposure | Get a diagnosis before buying parts. |
| The battery is swollen, damaged or difficult to remove safely | Stop and use a professional or manufacturer repair route. |
| The work requires microsoldering, board heating, paired security components or specialist calibration | Use an experienced repairer with the correct equipment. |
Identify the model and read the whole repair manual
Use the model identifier shown in the phone’s settings, packaging or manufacturer support system. Do not buy from the marketing name alone when regional variants exist. Confirm that the replacement part listing names the same model code and that its connector, frame option, colour and included small parts match the repair you intend to perform.
Read the procedure before ordering. Note the opening side, screw types, cable locations, battery-disconnection step, adhesive required and any post-repair software step. Google’s Pixel programme provides repair manuals and a diagnostics app for supported devices; Samsung recommends running Samsung Members diagnostics after a supported self-repair. Those tools are model-specific evidence, not a universal phone test.
A bundled repair pack can reduce missing-tool problems, but the listing still has to match the exact phone model and the manual’s required tools.

The minimum tools come from the procedure
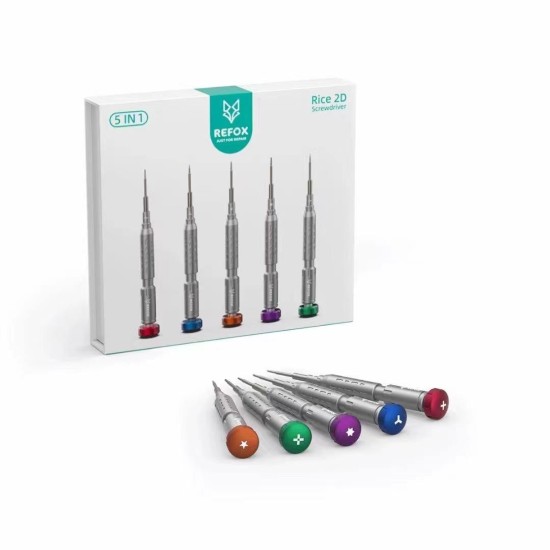
Do not start with a generic claim that three screwdrivers fit every phone. The correct driver profile and size must fit each screw; the opening tool must suit the phone’s seam; and the heat method must follow the manual. For many screen-access repairs the list may include a precision driver, suction handle, plastic picks, non-metal spudger, tweezers, parts organiser, eye protection and model-specific adhesive. A safe workspace and screw map matter as much as the tool count.
| Job stage | Typical tools | Common buy mistake |
|---|---|---|
| Fasteners | Model-matched precision bits (often Phillips, pentalobe, tri-point or Y-type depending on brand) | One “universal” bit that rounds soft screws |
| Opening the seam | Suction handle, thin plastic picks, plastic card; heat only if the manual allows it | Metal knives or uncontrolled hair-dryer heat near the battery |
| Disconnecting cables | Non-metal spudger / nylon pry tool, tweezers | Forcing connectors with a steel screwdriver tip |
| Keeping order | Magnetic mat or labelled trays, phone photos before each stage | Mixing screw lengths from different brackets |
| Resealing | Adhesive specified for that model; screen protector after a successful test | Assuming new adhesive restores the original IP rating |
For bit profiles and when a tip is the wrong shape, see phone repair screwdriver types. Digi4u stocks precision sets such as the REFOX RS2 2D screwdriver set and individual drivers such as the Mechanic iShell Max Phillips 1.2 — still match the bit to the screw map in your manual.
Follow a controlled repair sequence
- Photograph the device and confirm the exact model and symptom.
- Back up accessible data and record security or account steps required after repair.
- Read the complete model-specific manual and lay out every required tool and part.
- Power the phone off. Follow the manual’s opening direction, heat limits and cable warnings.
- Keep screws grouped by location and length. Never substitute a screw because it appears similar.
- Disconnect the battery at the point specified by the manual before working on powered components.
- Connect and test the replacement part before applying final adhesive when the procedure permits.
- Reseal with the specified adhesive and understand that a home reseal does not prove the original water-resistance rating.
- Run the manufacturer’s supported post-repair checks and test every function affected by the work.
Stop when the evidence changes
Stop if you find a swollen or punctured battery, corrosion or liquid residue, a torn cable, damaged connector pins, a stripped screw beside the battery, a bent frame that prevents a panel sitting flat, or a step that needs equipment you do not have. Also stop when the observed fault no longer matches the part you planned to replace. Buying a second part is not a diagnosis.
A repair guide is not proof that a particular phone is safe to open. Condition, prior repairs and hidden damage can change the risk. If you cannot keep the device stable, control heat or identify every connector, hand it to a qualified repairer.
Choose the next guide or part by evidence
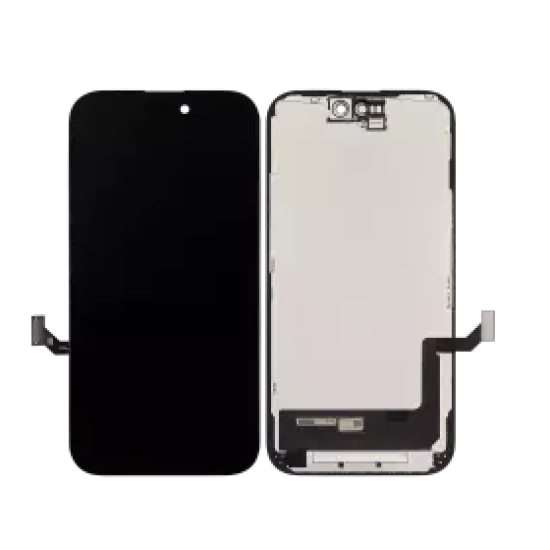
Once the symptom and model are confirmed, use the narrowest relevant guide: screen removal, battery service, charging diagnosis, speaker diagnosis or a manufacturer manual for that exact model. Digi4u’s repair-pack collection is relevant when the confirmed task is a supported screen replacement and the bundle matches the model. Browse iPhone screens or the wider repair parts hub only after the model code is confirmed. Check the individual listing for the screen type, included tools and adhesive; do not infer compatibility from a collection page.
Same-day dispatch is aimed at orders placed before 16:00, Monday to Friday (weekend / after-Friday-16:00 orders go out the next working day). Re-check the live delivery policy before promising postage timing to a customer.
Questions that remain before a first DIY repair
Can I use a hair dryer to open any phone?
No universal heat method is safe for every phone. Follow the model-specific manual. A hair dryer, hot plate or heat gun can overheat a display or battery if the procedure, distance and exposure are uncontrolled.
Will new adhesive make the phone waterproof again?
No. Correct adhesive and preparation may help reseal the enclosure, but a DIY repair does not prove the device has regained its original ingress-protection rating.
Is replacing a phone battery a low-risk beginner repair?
Not as a general rule. A removable, undamaged battery in a supported procedure is different from a strongly bonded lithium-ion cell beneath cables or a display. Swelling, deformation or uncertain removal should end the DIY attempt.
Which DIY phone repair tools should I buy first?
Buy from the confirmed procedure, not from a generic “starter kit” claim. Start with the exact driver bits, opening tools and adhesive named for your model. Add a parts tray and eye protection before you order a second specialty bit you might never use.
When should I refuse DIY and go to a shop?
Refuse DIY when the battery is swollen, liquid or corrosion is present, Face ID / board-level work is required, the frame is bent, or you cannot complete every step in the manual with the tools you have.
DIY opening without controlled heat is where batteries get punctured; shops equipping benches should read phone screen separation tools UK.