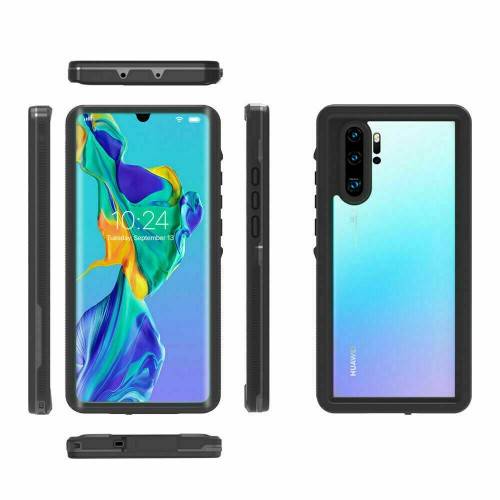
For UK repair professionals and informed Apple users, replacing iPhone and iPad batteries often brings a familiar challenge — avoiding compatibility warnings. With modern Apple devices featuring encrypted battery management ICs, every replacement must deliver safe charging, accurate health tracking, and genuine compatibility.
That’s where battery IC chip transfer technology — also known as battery IC transplant or IC chip cloning — transforms the repair process. This technology allows your replacement battery to function exactly like the original, removing “Unable to Verify This Battery” alerts and ensuring stable power performance.
At DIgi4u, our smart battery parts for iPhone and iPad come with pre-installed compatible IC chips, giving UK repair shops a trusted solution for fast, safe, and authentic battery replacements.
What Is Battery IC Chip Transfer?
Battery IC chip transfer is the process of moving or duplicating the original Apple battery’s microcontroller — the battery management IC — to a replacement cell.
This tiny component stores key data that links the battery to iOS, including:
- Serial number and battery ID
- Charging and capacity data
- Temperature and voltage thresholds
- Authentication information verified by iOS
Without this chip, the device cannot recognise the battery as genuine, leading to the battery warning message and disabling important features like battery health readings.
Through IC chip transplant or chip cloning, the new battery inherits this original data, restoring genuine compatibility and safe communication with iOS.
How Does the Battery IC Transplant Work?
Manual IC Chip Transfer
In this precision method, technicians:
- Carefully desolder the IC from the old battery.
- Bond it onto the new battery’s circuit board.
- Verify connection and communication via diagnostic tools.
This process requires skill, ESD protection, and specialised equipment. It’s preferred by advanced UK repair shops handling smaller batches.
Automated IC Chip Cloning
For higher efficiency:
- Tools extract data from the original chip and program it into a new compatible IC.
- The cloned IC is mounted on the replacement battery, fully recognised by iOS.
This is ideal for manufacturers and repair facilities handling bulk iPhone battery replacement or iPad battery replacement tasks.
IC Chip Transfer or Smart Battery Replacement Process
Whether you’re transferring the original battery IC chip from a damaged iPhone or iPad battery, precision and care are crucial. The goal is to ensure that the new battery communicates seamlessly with iOS and performs to original factory standards.
Preparation and Safety Check
Before starting the IC transfer or battery replacement:
- Power off the device completely and disconnect it from any power source.
- Remove the display assembly carefully using a suction tool and a heat mat (set around 70–80°C).
- Disconnect the battery flex cable first to prevent short circuits.
- Use an ESD-safe workstation and grounded wrist strap to protect sensitive components.
This stage ensures safe handling and prevents logic board damage.
Removing the Original Battery
- Gently heat the rear housing to soften the adhesive beneath the battery.
- Use plastic pry tools (never metal) to lift and remove the old battery from the frame.
- Avoid bending or puncturing the cell during removal.
- Keep the battery management IC area (on the small flex PCB) intact if you plan to transplant it.
If the old battery is badly swollen or torn, it’s safer to use a smart replacement battery that already includes a compatible IC.
IC Chip Transfer (When Using the Original IC)
For technicians performing an actual IC transplant:
- Locate the small IC module on the original battery’s PCB.
- Using a hot-air rework station (around 280–320°C), carefully remove the chip without damaging the circuit traces.
- Clean the solder pads using flux and solder wick.
- Position the chip on the new battery’s PCB and align it perfectly.
- Reflow or solder the chip, ensuring each pad is connected correctly.
- Use a microscope to inspect for bridges, cold joints, or misalignment.
Once installed, the IC will allow the new battery to retain the original serial number, calibration data, and iOS authentication.
Installing a Pre-Programmed Smart Battery
- Align the battery connector with the mainboard socket.
- Gently press the flex into place and secure with the logic board shield.
- Connect the display and other components temporarily for a quick power-on test.
- Verify that the system recognises the battery without a warning message.
This method eliminates soldering risk while still ensuring genuine battery compatibility.
Reassembly and Calibration
After the new or IC-transferred battery passes the power-on check:
- Reinstall all shields, brackets, and screws in their original positions.
- Clean adhesive residue and apply new battery adhesive strips.
- Close the display assembly carefully to avoid cable pinching.
- Boot up and charge the device to 100%, then let it discharge to around 10% to help iOS recalibrate its battery statistics.
This calibration ensures accurate health reporting and smooth charge behaviour.
Post-Repair Diagnostics
Once assembly is complete, run a full diagnostic:
- Check Battery Health & Charging in Settings — all data should display normally.
- Confirm no “Unable to Verify This Battery” or “Service” alerts appear.
- Monitor temperature, charge current, and cycle count using a repair tester (JC-V1S, QianLi, etc.).
After passing these tests, the device can be safely returned to the customer with performance identical to an original Apple-installed battery.
Why Battery IC Chip Transfer Matters
Apple’s power management ecosystem ensures device safety — but it also restricts unauthorised battery replacements. Without the correct IC data, replacements trigger the “Unable to Verify This Battery” alert.
Battery IC transfer is vital because it:
- Maintains accurate charging control and calibration
- Protects against overheating or voltage spikes
- Preserves full battery health data and cycle tracking
- Enables genuine battery compatibility recognised by iOS
- Prevents customer confusion or distrust caused by warnings
In other words, it allows independent UK repair shops to deliver repairs that feel factory-authentic and technically sound.
Post-Installation Testing After IC Chip Transfer
Once the battery IC chip transfer is complete — or a replacement battery with a pre-installed compatible IC has been fitted — a short diagnostic process should always follow to confirm correct operation and communication with iOS.
Step 1: Power-On Verification
After reconnecting the battery and securing the logic board shields, power on the device.
- The Apple logo should appear normally without flickering.
- If the device fails to boot or restarts repeatedly, recheck the battery connector and IC solder points.
Step 2: System Recognition
Go to Settings → Battery → Battery Health & Charging.
- The system should now display Battery Health Percentage and Peak Performance Capability.
- No “Unable to Verify This Battery” or Service message should appear. If the health menu is greyed out, communication between the battery management IC and iOS is incomplete — re-inspect data lines (SDA/SCL) and IC orientation.
Step 3: Charging Test
Connect an original or certified Lightning cable and observe the charging icon.
- Voltage and current should rise smoothly.
- The device should reach 100% without abnormal heat.
- Use a USB tester if available — charging current should stabilise between 1.5–2.0A for iPhones (model-dependent).
Step 4: Functional Check
Perform a short usage simulation to confirm normal battery discharge and temperature:
- Play a short video or perform a benchmark for 3–5 minutes.
- The battery percentage should decrease gradually, not in sudden drops.
- Surface temperature should remain within 35–40 °C under load.
Step 5: Final Validation
Finally, connect the device to a diagnostic tool (such as QianLi, JC-V1S, or other MFi-certified testers) to confirm:
- Battery cycle count and design capacity read correctly.
- Serial number matches the transferred IC data.
- All protection circuits (NTC, over-current, and voltage cut-off) respond properly.
Once all these checkpoints are passed, the IC-transferred or smart replacement battery can be considered fully compatible and safely integrated with the device — delivering performance identical to the original.
After completing the IC transfer, you may want to check the final testing procedure and ensure that the device is functioning normally again.
👇Here are some operation videos you can refer to.👇
Inside the Battery Management IC
The battery management IC — sometimes called a BMIC — is responsible for:
- iOS Communication: Syncs real-time battery data with the operating system.
- Safety Protection: Monitors temperature, current, and voltage.
- Performance Control: Adjusts charging speed and efficiency to extend lifespan.
When this chip isn’t recognised, your device cannot verify the battery’s authenticity — resulting in a battery warning message and limited data visibility.
Through battery IC cloning or transfer, full communication is restored, ensuring safe battery repair and stable performance.
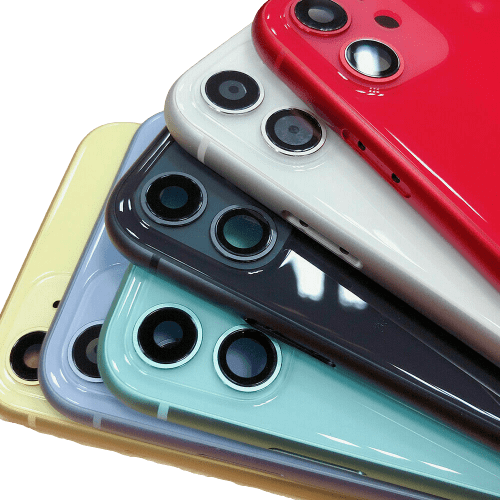
Our Smart Battery Parts: Genuine Compatibility, Ready to Install
At Digi4u, we’ve engineered a smarter way to perform iPhone and iPad battery replacements.
Each battery comes ready for installation, featuring:
- ✅ Pre-installed IC chip for instant iOS compatibility
- ✅ Zero warning messages after installation
- ✅ Accurate capacity and charge reporting
- ✅ Safe battery management IC calibration
- ✅ UK-tested quality for long-term reliability
By combining innovation with safety, our smart battery parts allow UK technicians to deliver genuine-level results with efficiency and confidence.
Common Issues Without IC Matching
Using batteries without proper IC matching can lead to:
- “Service” or “Unable to verify this battery” messages
- Inaccurate battery percentage readings
- Disabled battery health information
- Shorter lifespan or unstable charging
The solution is simple: use smart batteries with pre-transferred or cloned IC chips. They eliminate these issues entirely and restore genuine Apple-like performance.
FAQ: Battery IC Chip Transfer for iPhone and iPad
Q1: What is battery IC chip transfer?
A1: It’s the process of moving or cloning the original Apple battery’s microchip onto a new replacement battery to ensure genuine battery compatibility.
Q2: Why does my iPhone show “Unable to Verify This Battery”?
A2: This message appears when the replacement battery lacks Apple’s authentication data stored in the battery management IC. Using IC-transferred or pre-programmed smart batteries prevents this.
Q3: Is IC chip cloning safe?
A3: Yes. When performed by professionals or when using factory pre-cloned batteries, it’s completely safe and maintains Apple-level power control.
Q4: Are your batteries compatible with UK models?
A4: Absolutely. All our replacement batteries are tested for UK-spec iPhones and iPads, ensuring safe battery repair and genuine compatibility.
Conclusion: Genuine Compatibility for Every Repair
In today’s precision-driven repair market, battery IC chip transfer technology has become a must for professionals aiming for true Apple-quality results.
Through expert IC chip transplant, Digi4u UK repair shops can guarantee:
- Safe, stable charging
- Accurate power management
- Full battery health visibility
- Zero verification errors
Power every repair with confidence — explore our range of genuine-compatible batteries today.
👉 Visit Digi4u’s Battery Parts Collection to order your iPhone-compatible Battery or iPad-compatible batteries now.