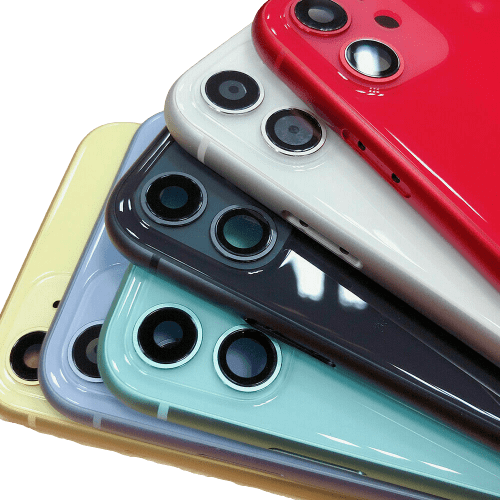
Modern smartphones rely heavily on rear cameras for daily use, from photography to scanning documents and recording videos. However, due to their exposed position and delicate internal structure, rear cameras are also one of the most frequently damaged components seen in repair shops. From cracked lens glass to complete image failure, different types of damage require very different repair approaches.
From a professional technician’s perspective, the most important step before any repair is accurate diagnosis. Many users assume that any camera issue requires replacing the entire module, but in reality, some problems are external and relatively easy to fix, while others involve internal components or even motherboard-level faults.
Identify the Symptoms Clearly
- External Damage with Simple Fix
One of the most common issues is a cracked camera lens glass. This is purely an external problem caused by drops or impacts, and it does not necessarily affect the camera module itself. However, once the glass is damaged, it can lead to blurry images, glare, or light distortion. In such cases, replacing only the lens glass is usually sufficient. The key point during this repair is to ensure that all broken glass and dust particles are completely removed before installing the new lens, as any contamination left inside can permanently affect image quality.
- Internal Component Issues
Another frequently encountered problem is blurry images or failure to focus. Unlike glass damage, this type of issue is often related to internal components such as the autofocus motor or lens assembly. In some minor cases, external dirt or smudges can cause focusing problems, which can be resolved through careful cleaning. However, if the autofocus mechanism itself is damaged, the only reliable solution is to replace the entire rear camera module.
- Black Screen or Camera Not Working
More serious cases include situations where the camera shows a black screen, fails to open, or crashes the camera app. These symptoms usually indicate either a failed camera module, a loose or damaged flex cable, or in more complex scenarios, a motherboard-related issue. A professional technician would typically start by checking connections and testing with a known-good replacement module. If replacing the module does not resolve the issue, further diagnosis at the board level is required.
- OIS Stabilization Failure
In addition to these issues, camera shaking or unusual vibration is another problem that is often misunderstood. This is typically caused by a failure in the optical image stabilization (OIS) system. Once the stabilization mechanism is damaged, it cannot be repaired individually, and the entire camera module must be replaced. Attempting partial repairs in such cases is generally not effective.
- Internal Contamination Problems
Another subtle but important issue is the presence of dust or black spots in photos. This usually occurs when dust enters the camera module, often as a result of previous improper repairs or damaged lens protection. Cleaning internal camera components requires disassembling the device and handling delicate parts, which is generally recommended only for experienced technicians. In severe cases, replacing the module is more efficient and reliable.
Repair Strategy: Choosing the Right Solution
- Start with Diagnosis, Not Replacement
When dealing with rear camera issues, one of the biggest mistakes inexperienced users make is jumping straight into replacing parts without proper diagnosis. From a professional repair technician’s perspective, accurate troubleshooting is far more important than the repair itself. A correct diagnosis not only saves time and cost but also prevents unnecessary damage to the device.
- Identify Symptoms to Determine Possible Causes
A standard diagnostic process usually starts with observing the symptoms. Different types of camera issues often point to completely different causes. For example, a blurry image could be caused by a cracked lens glass, dirt contamination, or autofocus failure. Similarly, a black screen may indicate anything from a loose connection to a damaged camera module or even a motherboard fault. Understanding these differences is the foundation of effective repair.
- Perform External Inspection First
Once the symptoms are identified, the next step is to perform basic external checks. This includes inspecting the camera lens glass for cracks, scratches, or dirt. In many cases, what appears to be a serious camera issue is actually just surface-level damage. Cleaning the lens or replacing the outer glass can often restore normal functionality without the need for more complex repairs.
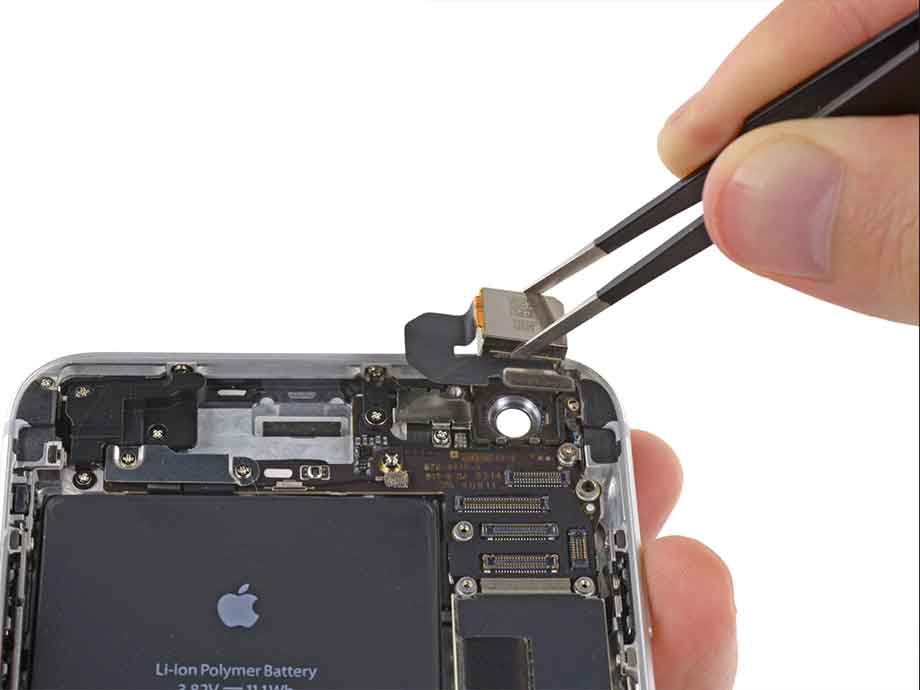
- Check Internal Connections and Flex Cables
If external inspection does not resolve the issue, a technician will move on to internal diagnostics. This typically involves opening the device and checking whether the camera flex cable is properly connected. Loose or partially disconnected cables are a common cause of camera failure, especially after previous repairs or impact damage. Simply reconnecting the cable can sometimes fix issues such as black screens or intermittent functionality.
- Test with a Known-Good Camera Module
When connection issues are ruled out, the next step is component testing. Professional technicians often use a known-good camera module to quickly determine whether the original camera is faulty. If the replacement module works normally, it confirms that the issue lies within the original camera unit. In such cases, replacing the rear camera module is the most efficient and reliable solution.
- Investigate Motherboard-Level Issues if Needed
However, if replacing the camera module does not fix the issue, the problem is likely more complex. At this stage, attention shifts to the motherboard. Issues such as power supply failure, signal line damage, or control circuit faults can all prevent the camera from functioning properly. These types of repairs require advanced diagnostic tools and micro-soldering skills, and are typically beyond the scope of DIY repair.
- Apply the Minimum Intervention Repair Principle
In terms of actual repair decisions, experienced technicians always prioritize minimal intervention. If only the lens glass is damaged, replacing the glass is sufficient. If autofocus or stabilization fails, replacing the entire module is necessary. And if the issue originates from the motherboard, a cost-benefit analysis is usually required to determine whether repair is worthwhile.
DIY vs Professional Repair
For DIY users, understanding this diagnostic workflow is especially important. Simple repairs such as lens glass replacement, are generally safe if done carefully. However, internal repairs require experience and proper tools. Attempting complex repairs without proper knowledge can lead to further damage. A successful rear camera repair depends on a structured diagnostic process rather than guesswork. By identifying the root cause and applying the correct solution, repair success rates can be significantly improved.